Understanding Vapor Barriers
What is a Vapor Barrier?
A vapor barrier is a material that resists the diffusion of moisture through walls, floors, and ceilings, helping to prevent the passage of water vapor from outside to the inside of a building. It is usually made of polyethylene plastic, foil, or other moisture-resistant materials designed to minimize the potential for mold growth, wood rot, and structural damage. By effectively controlling moisture levels, vapor barriers play a crucial role in maintaining the integrity of buildings, particularly in areas prone to high humidity or flooding.
Importance of Vapor Barrier Installation
The installation of vapor barriers is critical in protecting homes, especially in regions with significant environmental moisture. A well-installed vapor barrier can:
- Prevent mold and mildew growth by reducing humidity levels.
- Protect insulation materials from moisture, maintaining their R-value.
- Reduce the risk of structural damage due to water intrusion.
- Enhance indoor air quality by minimizing allergens and pathogens.
Given these benefits, a thoughtful approach to Vapor Barrier Installation is fundamental for any homeowner.
Types of Vapor Barriers
There are several types of vapor barriers that can be utilized depending on the environment and specific needs:
- Polyethylene Sheeting: The most common type, usually available in thicknesses of 4 to 6 mils. It is ideal for crawl spaces and basements.
- Foil Vapor Barriers: Reflective materials that are effective in hot climates, installed facing the inside of a home.
- Spray-On Barriers: Liquid applied membranes that can be sprayed directly onto surfaces, ideal for difficult areas.
Preparing for Vapor Barrier Installation
Assessing Your Crawl Space
Before installation, it’s essential to assess your crawl space or basement. Look for signs of excessive moisture, mold, or structural damage. Determine the condition of your existing insulation and any signs of water pooling. A dry environment is crucial for the effective implementation of the vapor barrier.
Gathering Necessary Tools and Materials
Successful vapor barrier installation requires specific materials and tools:
- Vapor barrier material (polyethylene or foil)
- Utility knife or scissors
- Tape or adhesive for sealing edges
- Stapler or fasteners for securing overlaps
- Measuring tape for accurate installation
- Safety gear (gloves, mask, knee pads)
Safety Precautions
Safety is paramount when working in confined spaces. Ensure proper ventilation, wear appropriate safety gear, and consider a buddy system if tackling extensive installations. Also, be aware of any electrical wiring or plumbing systems that may be present in the crawl space, thus avoiding accidental damage.
Steps for Effective Vapor Barrier Installation
Clearing the Area and Measuring
Start by clearing the crawl space or designated installation area of any debris, water, or old insulation that could interfere with the vapor barrier. Measure the dimensions of the space to determine how much vapor barrier material will be needed. It’s essential to account for overlaps and positioning of the material.
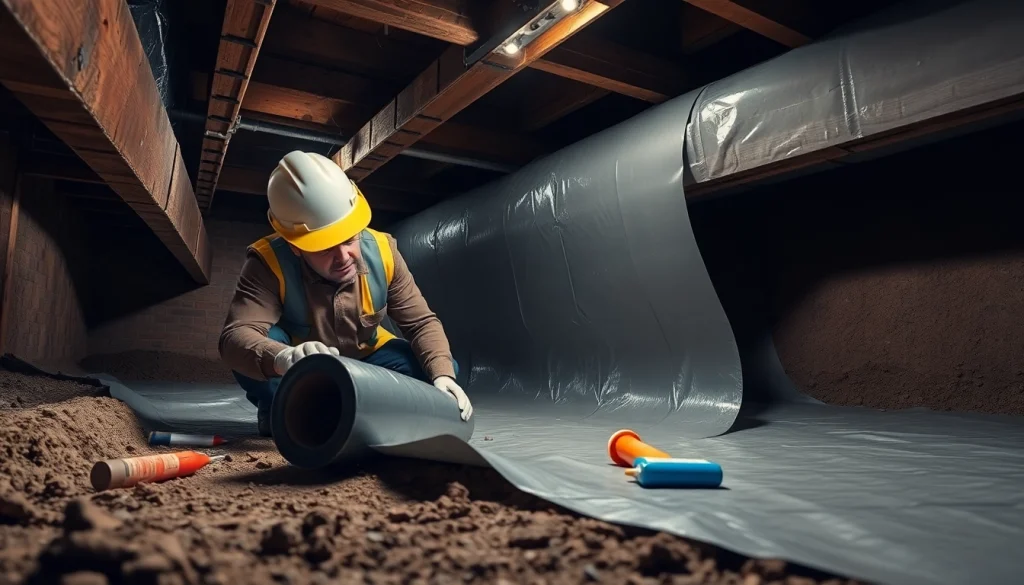
Installing the Vapor Barrier
Begin installing the vapor barrier by laying it out along the ground, ensuring it covers all exposed areas. Overlap seams by at least 12 inches and adhere them with strong tape or adhesive. Use a staple gun to secure the barrier at the foundation walls, ensuring it is stretched tight to avoid pooling.
Sealing and Insulation Techniques
Once the vapor barrier is in place, it’s vital to seal all edges and seams thoroughly. This might involve applying additional tape or an adhesive sealant to keep moisture from seeping in. If you’re working in a highly humid environment, consider using insulated sheets above the vapor barrier for added protection and efficiency.
Common Challenges in Vapor Barrier Installation
Dealing with Moisture Issues
One of the foremost challenges during vapor barrier installation is the presence of moisture in the crawl space. If moisture continues to seep in, even the best vapor barrier will fail. It is advisable to address any sources of moisture, such as leaks or high groundwater levels, before completing the installation. Solutions include installing a sump pump or improving drainage systems around your foundation.
Fixing Tears and Damage
Wear and tear can occur over time, leading to small tears or punctures in the vapor barrier. Regular inspection is vital. For minor damage, use a patch made from the same material and seal it with waterproof tape. If there are extensive damages, replacement may be necessary to maintain effective moisture control.
Maintaining the Installation
After vapor barrier installation, ongoing maintenance is critical. It’s recommended to inspect the crawl space or installation area annually to ensure everything remains intact. Check for signs of mold, moisture accumulation, and potential damage to ensure the long-term success of the installation.
Frequently Asked Questions about Vapor Barrier Installation
How long does a vapor barrier last?
A well-installed vapor barrier can last for many years, typically 10 to 20 years, depending on environmental factors and maintenance. Regular inspections help extend its lifespan.
Can I install a vapor barrier myself?
Yes, installing a vapor barrier can be a DIY project, provided you take all necessary precautions and follow the outlined steps. However, consulting a professional can ensure proper installation and handling of complex issues.
What materials are best for vapor barriers?
Polyethylene sheeting is the most common material for vapor barriers, due to its excellent moisture resistance. However, foil and spray-on barriers may be preferable in specific conditions based on local climate.
How does a vapor barrier affect humidity?
A vapor barrier helps control humidity by preventing moisture from the ground or outside environment from entering the indoor space, which can lower indoor humidity levels and improve comfort.
When should I replace my vapor barrier?
Replace your vapor barrier when you notice significant tears, signs of mold or mildew, or when it exhibits wear and tear after many years of exposure to potential moisture sources.